FAQs
If you don't find the answer here, please contact us.
If a recipient hasn't received your ecard, please double-check the accuracy of your recipient's e-mail address.
If the e-mail address is correct, please go to the card history and see if your card is there.
If the card was sent and the recipient didn't receive it, his/her internet service provider could have moved the card email to a bulk/spam folder for some reason. You can ask the recipient to check the bulk/spam folder for the card email.
If you are not satisfied with your membership and our service, we will refund your membership fee within the first 30 days. Just send us a request.
Go to the card history. You can see the status for each "card group". When you sent/scheduled a card, all the recipients you created for this card belong to this "card group". In the Action drop down menu, you can perform the following actions. Here is a short video tutorial for sending a card.
1) Click the tracking to see the status of the card sent to each recipient.
2) Click the edit card to change card greetings & message.
3) Click the edit ingo to change email subject & message.
4) Click the change date to change the schedule.
5) Click the send more to add/delete recipients.
Go to the address book . Here is a short video tutorial for adding addresses.
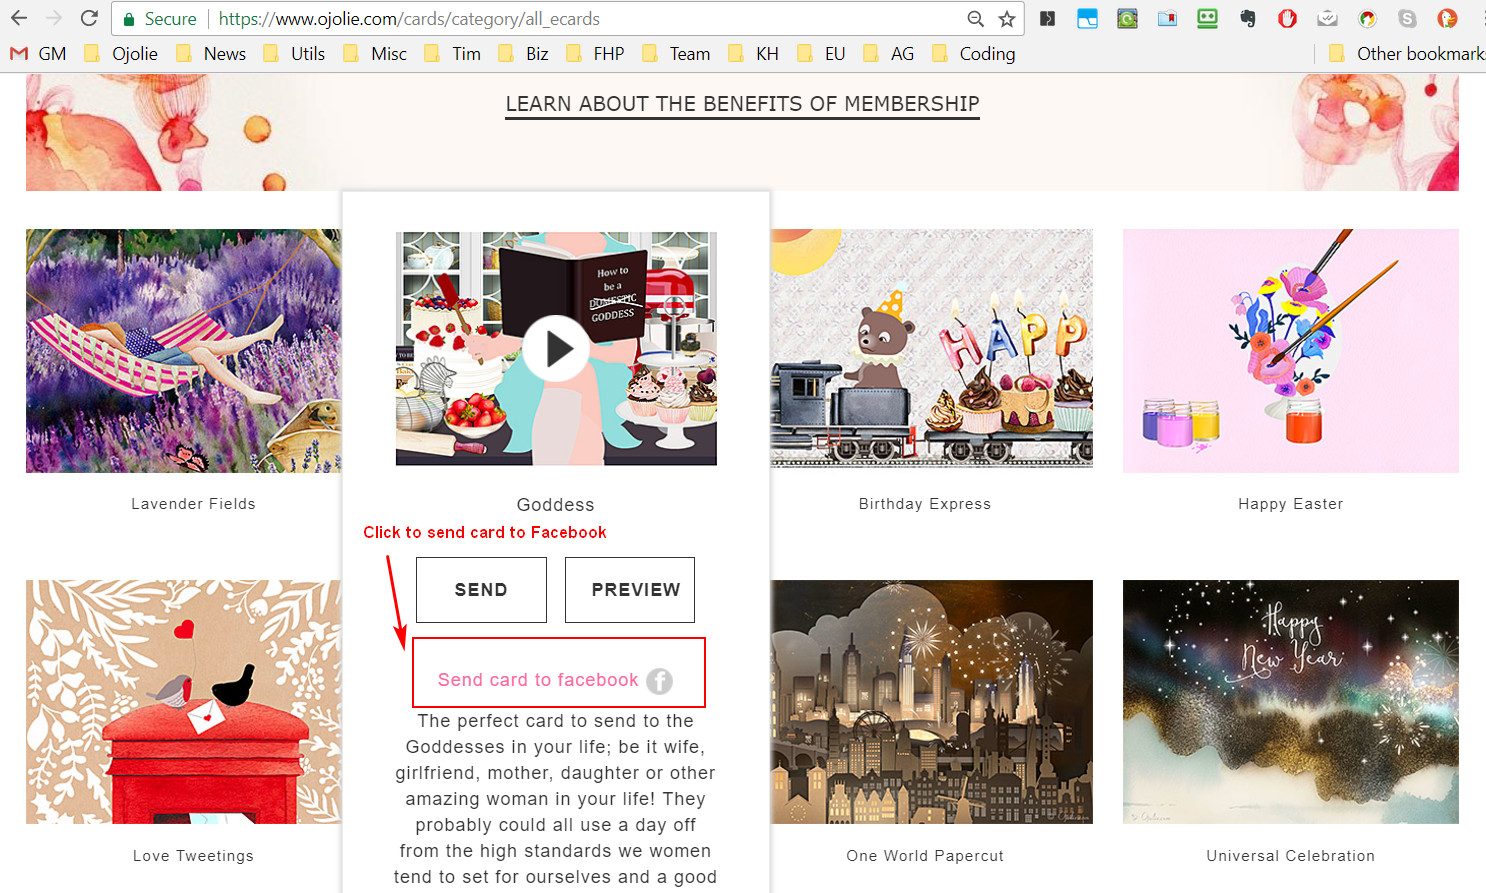
On the card list page, below the "SEND" and "PREVIEW" buttons, there is link that you can click to send the card to Facebook.

It shows the following: - edit the greetings and message - add an address manually - add an address from the address book - edit the email subject and message - schedule for a later date
Here is the instruction to send a card.
- Select a card.
-
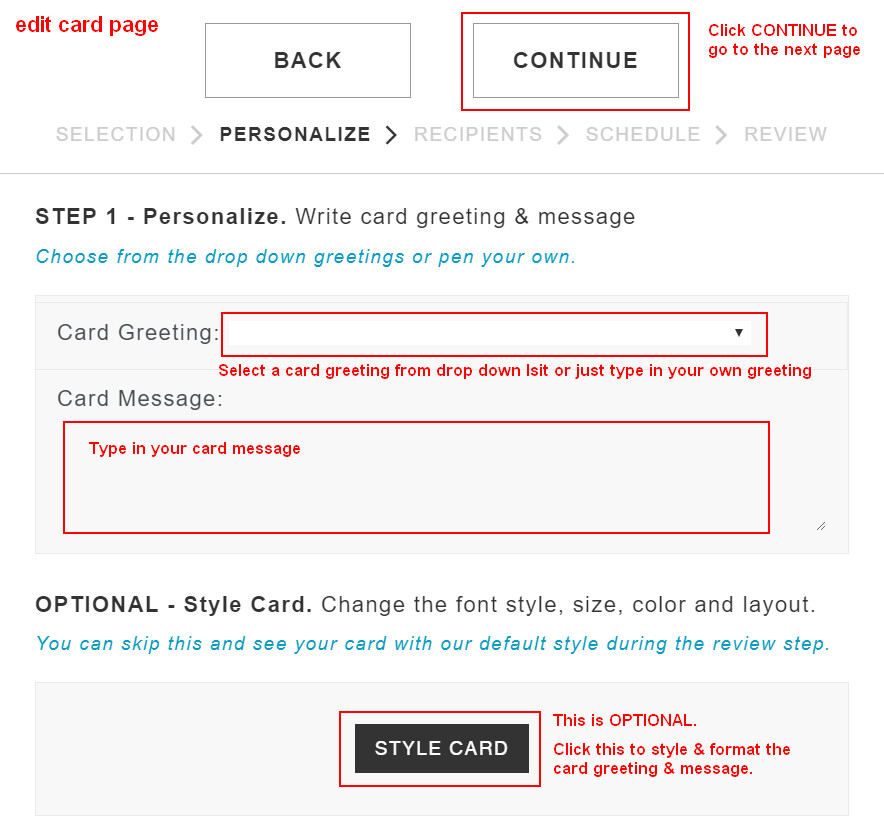
On the edit card page, select or type in a card greeting and a card message. Click CONTINUE button to go to the add recipient page. You can click the STYLE CARD button to format/style the text.

-
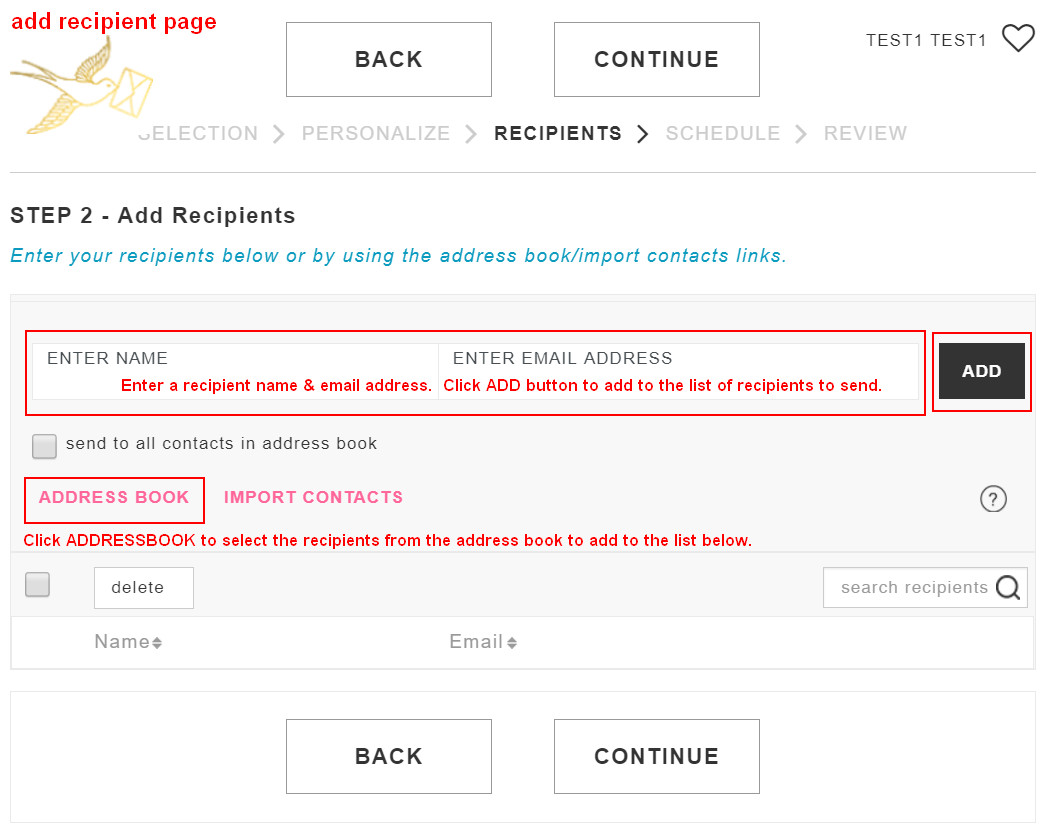
On the add recipient page, add recipient names & email address or use the address book to add them. Click CONTINUE button to go to the next page.

-
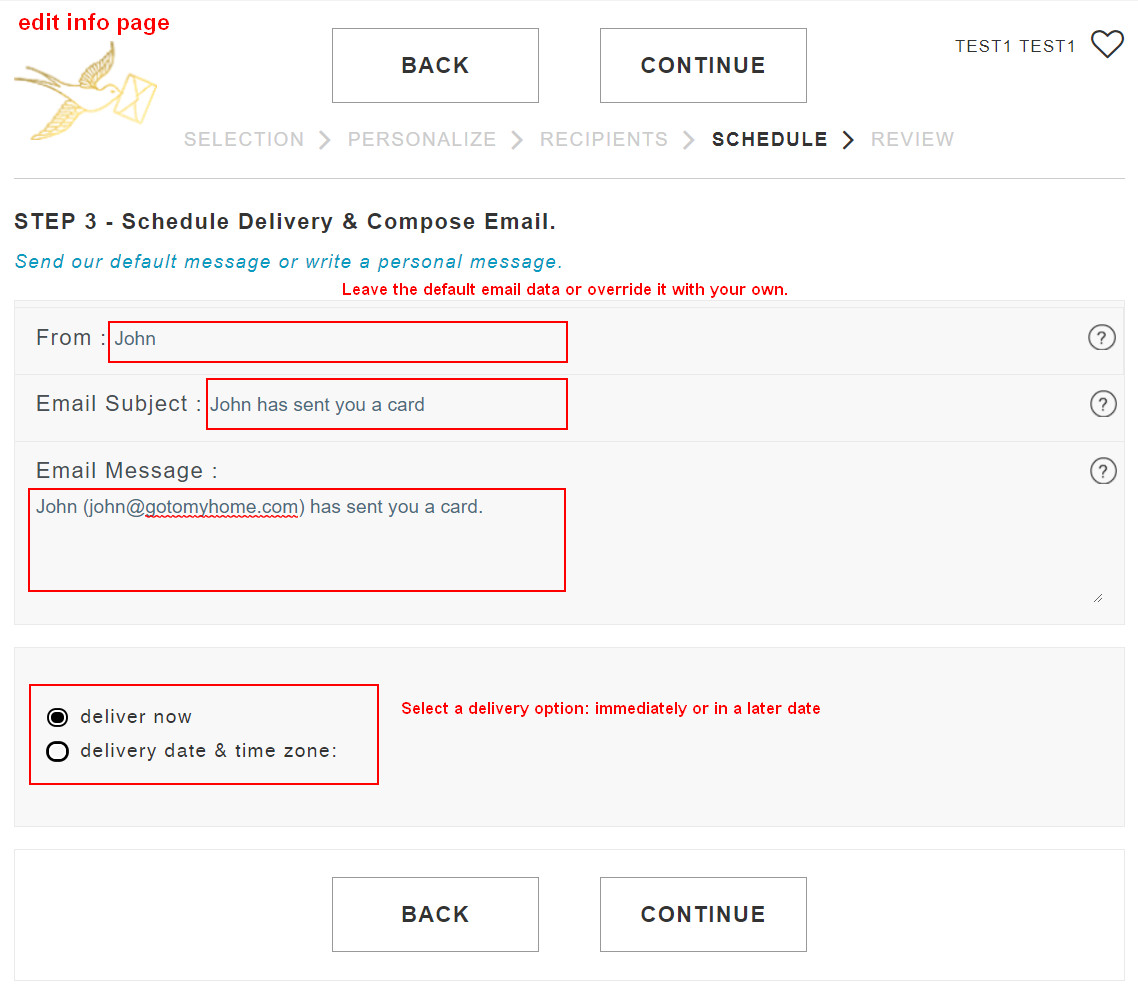
On the edit info page, If needed, override the default email subject and email message. There is also an option to schedule the card for a later delivery. Click CONTINUE button to go to the review page.

- On the review page, you can review the card, recipients, and delivery setting. Click SEND button to send or schedule the card.
- After you send the card, you will see a confirmation page that the card has been sent/scheduled. You can click the "CARD HISTORY" button to see the status of the card. You can click the "SEND MORE" button to add more recipients (if the card has not been sent) or to create another card with the card greeting, card message, email subject, and email message pre-populated from this card.
We offer a free membership and paid membership. Please go to the Pricing page to sign up or renew.
A free membership allows you to send the free cards in our card collection.
A paid membersihp allows you to send all cards on the site.
Please log in to your existing account with your email address and password. Then click the Pricing menu item to renew.
FAQs
If a recipient hasn't received your ecard, please double-check the accuracy of your recipient's e-mail address.
If the e-mail address is correct, please go to the card history and see if your card is there.
If the card was sent and the recipient didn't receive it, his/her internet service provider could have moved the card email to a bulk/spam folder for some reason. You can ask the recipient to check the bulk/spam folder for the card email.
If you are not satisfied with your membership and our service, we will refund your membership fee within the first 30 days. Just send us a request.
Go to the card history. You can see the status for each "card group". When you sent/scheduled a card, all the recipients you created for this card belong to this "card group". In the Action drop down menu, you can perform the following actions. Here is a short video tutorial for sending a card.
1) Click the tracking to see the status of the card sent to each recipient.
2) Click the edit card to change card greetings & message.
3) Click the edit ingo to change email subject & message.
4) Click the change date to change the schedule.
5) Click the send more to add/delete recipients.
Go to the address book . Here is a short video tutorial for adding addresses.
On the card list page, below the "SEND" and "PREVIEW" buttons, there is link that you can click to send the card to Facebook.

It shows the following: - edit the greetings and message - add an address manually - add an address from the address book - edit the email subject and message - schedule for a later date
Here is the instruction to send a card.
- Select a card.
-
On the edit card page, select or type in a card greeting and a card message. Click CONTINUE button to go to the add recipient page. You can click the STYLE CARD button to format/style the text.

-
On the add recipient page, add recipient names & email address or use the address book to add them. Click CONTINUE button to go to the next page.

-
On the edit info page, If needed, override the default email subject and email message. There is also an option to schedule the card for a later delivery. Click CONTINUE button to go to the review page.

- On the review page, you can review the card, recipients, and delivery setting. Click SEND button to send or schedule the card.
- After you send the card, you will see a confirmation page that the card has been sent/scheduled. You can click the "CARD HISTORY" button to see the status of the card. You can click the "SEND MORE" button to add more recipients (if the card has not been sent) or to create another card with the card greeting, card message, email subject, and email message pre-populated from this card.
We offer a free membership and paid membership. Please go to the Pricing page to sign up or renew.
A free membership allows you to send the free cards in our card collection.
A paid membersihp allows you to send all cards on the site.
Please log in to your existing account with your email address and password. Then click the Pricing menu item to renew.


